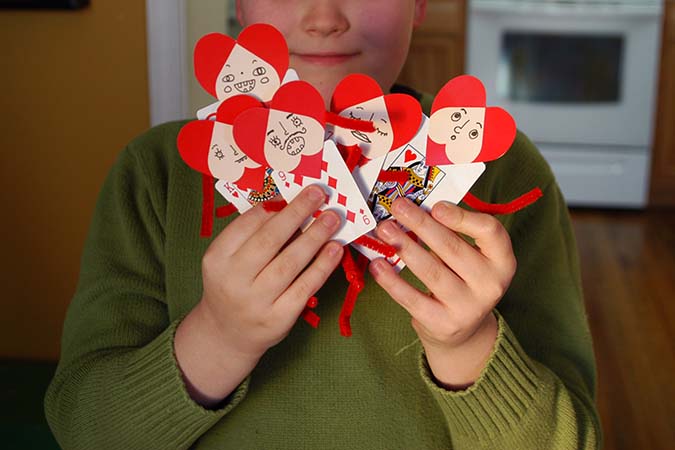

We got a head start on B’s Valentines this year, which is great because Valentine’s is sneaking up on us quick! B is in 4th grade this year, so I checked when we were at the store to see if wanted to buy any of the Valentines they had for sale. I don’t want to be the mom forcing my kid to make a Valentine if all he wants to do is buy Phineas & Ferb cards for his friends (because just to be clear I will buy the hell out of some store valentines if my guy wanted) but he said he still wanted to make his own, and that he thought the store ones were “boring”. So I threw out a few ideas and this is the one he really liked. He loves drawing faces, and his noses are my favorite. He has two more years in school for Valentine parties and every year I wonder if it will be the last one he wants to make Valentines, but he is still going strong!
He is almost ten, so he was able to do almost every part of these valentines all on his own, our glue gun is really hot so I helped with glue. If your kids are younger (or don’t have hot glue experience) then you can do the glueing and they can draw the faces and write the “to’s and froms” on the back. The supplies are super simple too…

Supplies:
–
Valentine Face PDF, I had ours printed on cardstock, but if you didn’t want to print out faces you can just cut hearts from construction paper
-glue, I felt like hot glue works best, and dries quick but you can use whatever you like
-pipe cleaners, we did red but you can use any color
-pen, for drawing on the faces…you can use wiggly eyes too!
-playing cards, we found ours at the dollar tree. two packs for $1 and we found two different sizes
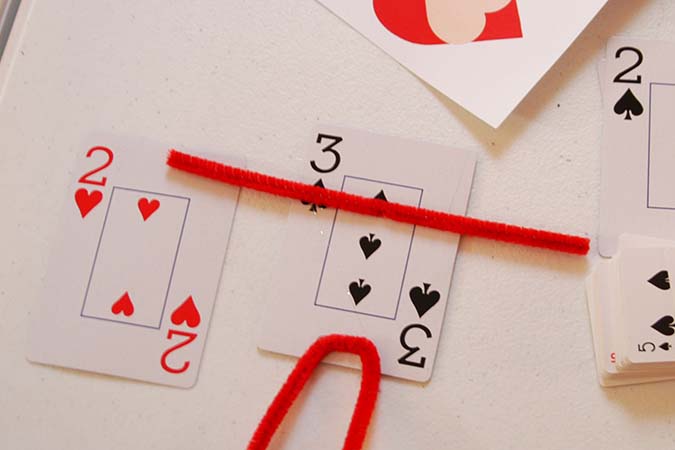
1. First we separated the cards into two piles, we wanted to use all red cards for the card on top, and the black ones for the card that the legs and arms are glued to. You could just use all the heart cards if you want them to be extra festive.
2. For regular sized playing cards we cut a pipe cleaner in half and glued one half down for arms (on a black face up card) and the other half for the legs. We used half a pipe cleaner for the smaller cards.

3. Then add more glue over the top of the arms, legs and card, and press the red card down and hold it in place for a few seconds.

4. Next cut out your hearts and draw some faces, then glue the heads on. You can write you message on the back of the cards with a sharpie pen, or even write on the back of the heads.

Heehee I loved the little face he made, and I didn’t even notice until I was editing the photos, it made me crack up! You can have the little pipe cleaner hands hold a piece of candy (or maybe a super tiny playing card?) We thought it would be amazing if we could find little chocolate roses for them to hold (painting the roses red!) and are considering making our own since we still have some time. If we do i’ll report back with some photos.
**Personal use means non-commercial use of the valentines including copies and print outs for yourself, your personal crafts/scrapbooking and to give to friends. The valentines may not be used in any way whatsoever in which you charge money, collect fees, or receive any form of remuneration. The valentines may not be used in advertising, and they may not be resold.***