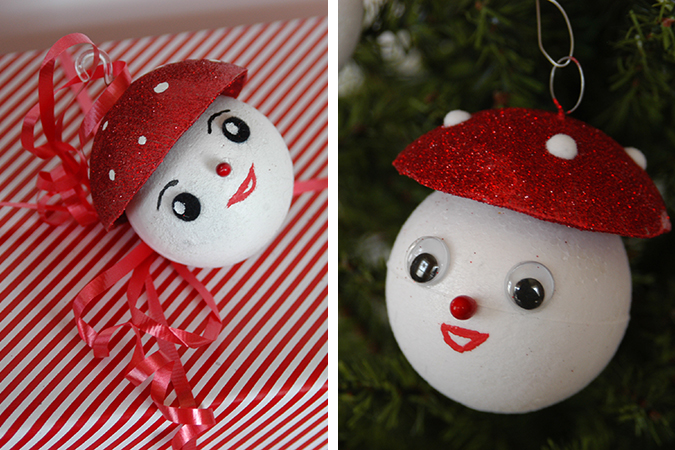
Today I wanted to share a little DIY for a vintage inspired ornament. Not only do these make cute ornaments, but they are great tied to the top of gifts too. I actually have a folder on my computer for vintage Christmas ornaments I want to try and recreate, so I am happy to get one done in plenty of time for Christmas!
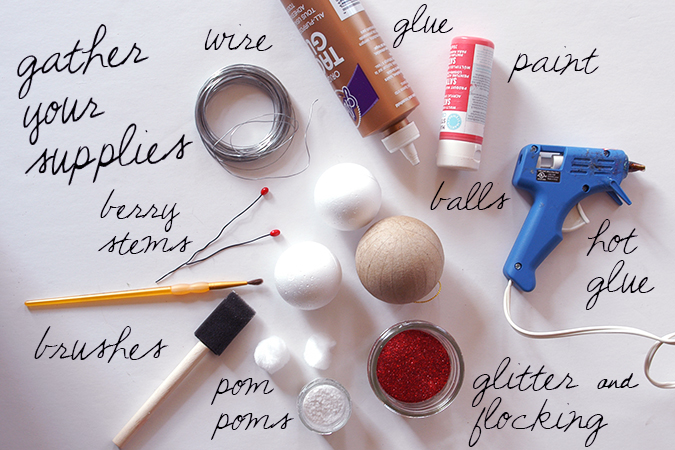
These guys are really customizable, so wether you want to paint on eyes, eyebrows, and a smile, use wiggly glue on eyes or cut shapes out of felt-anything goes! Here are your basic supplies:
-Styrofoam balls: I opted for the firm balls that have a smooth surface
-Paper Mache balls: These were slightly tricky because they had a rubbery like ball hidden inside under the paper mache, just look for balls made of cardboard exclusively to make cutting easiest. These sorts of balls still work of course, they just take a little more care to cut.
-Glue: You’ll need thick tacky glue and a hot glue gun
-Berry Stems- these are for the noses, but you could always skip noses, cut them from felt, or paint one on instead.
-Brushes
-Pom-poms: these act as a buffer between the mushroom cap and body. If you glue the cap directly onto the body it ends up covering part of the face and didn’t quite match the look of the vintage ornaments.
-Paint-You’ll need red, optional colors are black and white (for face painting)
-Wire- This is to create a hanger on top, but you can also glue a plastic hanger in place like I did on a couple of the ornaments instead.
-Red Glitter
-White Flocking Powder

1. Use scissors to cut your ball in half. Then trim it until its a bit smaller and looks good with your body styrofoam ball.
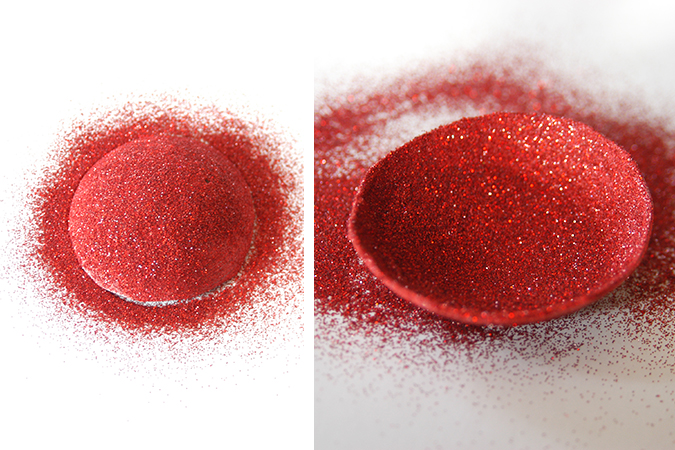
2. Paint one side of the mushroom top red and immediately sprinkle with red glitter, allow to dry and then do the same to the other side. Make sure the very edge is covered as well. Set aside to dry.

3.. Next your are gonna coat the styrofoam ball with the thick tacky glue. I like the poke a wooden craft stick into the end of the ball to make it easier to hold. Then sprinkle the whole thing with white flocking powder (follow instructions for powder about well ventilated area) Let this dry completely.
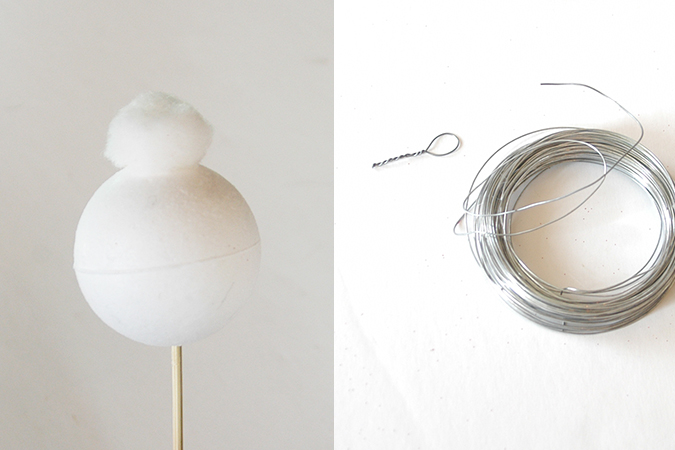
4. Use hot glue to attach pom pom to top of body. Twist wire into a little hook and insert end through top of mushroom, I use a little hot glue to secure the end in place. Then glue mushroom cap onto the pom pom.
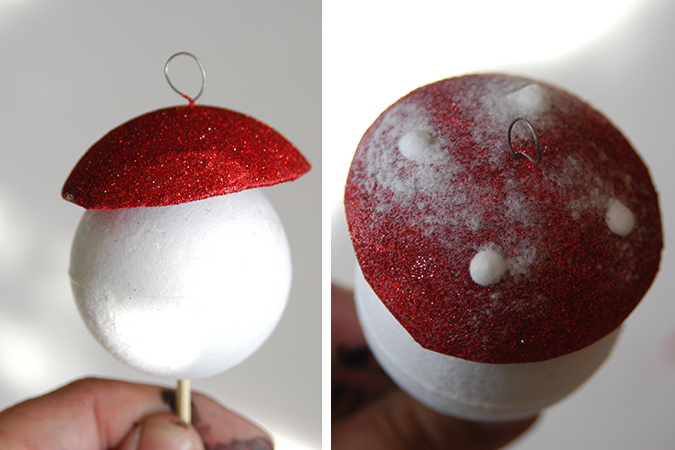
5. To add flocked dots, apply little dots of tacky glue to the top and sprinkle on the flocking powder. Then you just blow away what doesn’t stick and you’ll be amazed at how nice and clean your flocked dots are. Or you can cut some from felt and glue them on.
6. Lastly once it’s all dry you can add your face. Cut the nose stem short and push it into the ball. Paint on eyes, glue on wiggly eyes etc. and voila!
I’d love to see them if you make any!
