How To Tuesday – Fabric Button Hairbands
 Today’s DIY is super simple, and I think would actually make a great project for a Crafternoon. Everyone could bring fabric scraps and once you have one of the Button Kits
,you can buy a few of the refills
. This project is also really easy to make with kids!
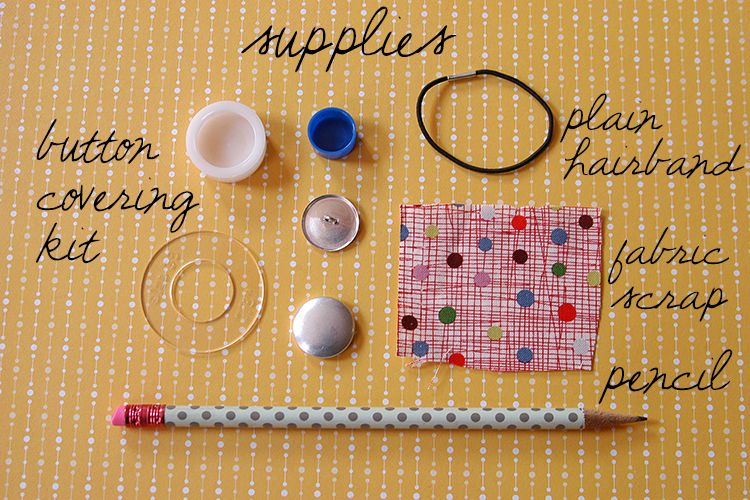 The supplies are easy too..
–fabric button covering kit (they sell these at stores like Michael’s and Joannes too so you can use a coupon)
-plain hairband (the kind without the metal connector work best, but this is what I had on hand)
-pencil
-fabric scraps
 The button covering kit comes with this little circle tool that helps you to line up your design. You put the tool on the fabric and the opening in the middle shows you what will show on the actual finished button. This makes it great for picking cute elements from your fabric to feature. Then trace around the outer edge with a pencil for your cut line, and cut out the circle.
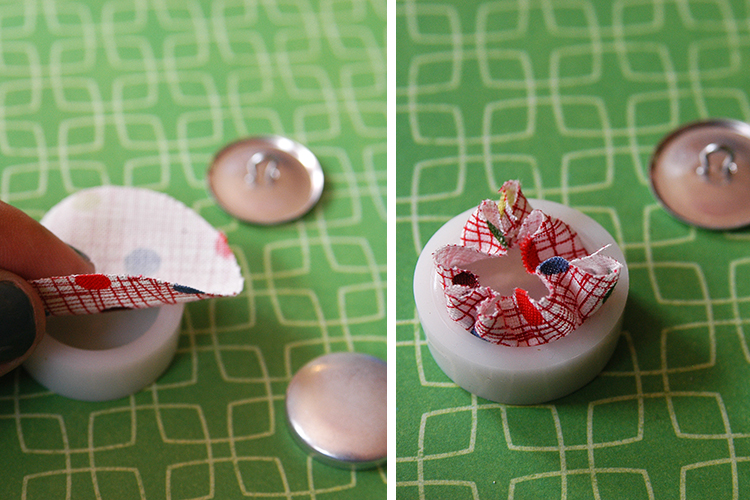 Lay your fabric face down into the plastic button maker that comes with the kit. Then push the flat circle disc into the circle (smooth side down) This forms the front of your button. Tuck all your ends of the fabric in.
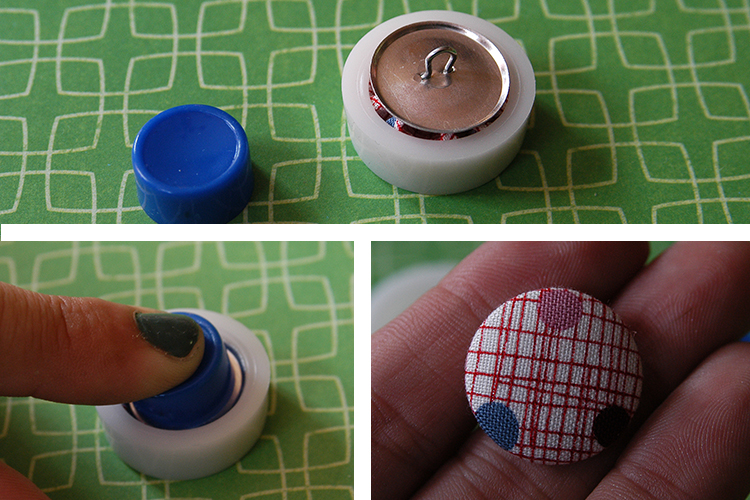 Put on the button back with the hook facing up, and use the blue tool to push it down into the button front. You will feel a snap as it locks into place. You can then remove your button from the button maker and your button is done! It’s so easy and fast!
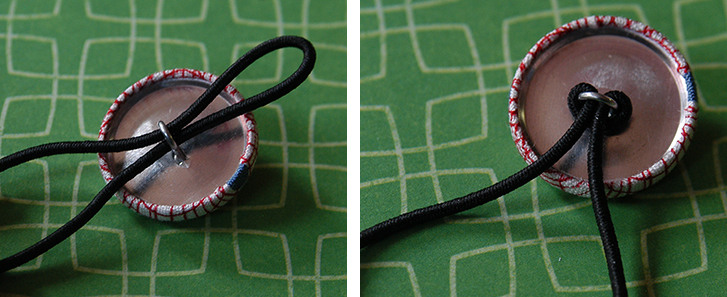 Now insert your hairband into the loop on the back, and bring the loop over the entire button to secure. If you have trouble feeding the hair band into the loop you can use tweezers to grab it, but mine went through pretty easily. You can leave your hairband this way for just one decorative band. Or you can add a second button.
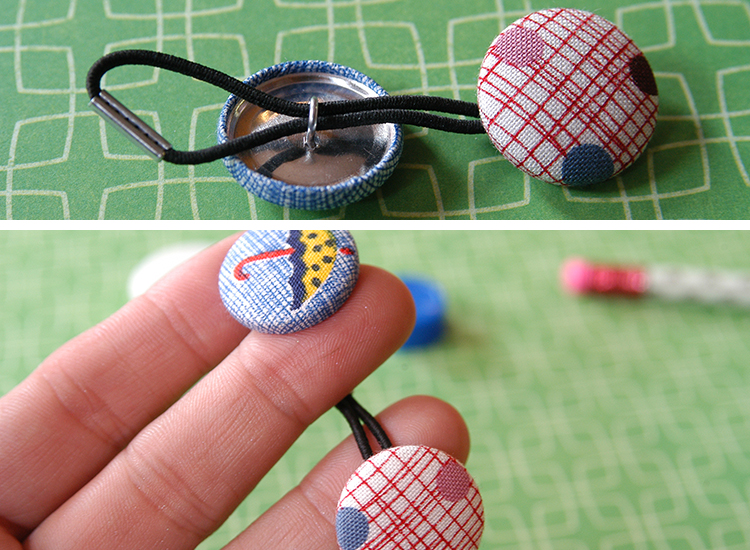 You add the second button the same way, and bring the hair band around the button to secure. Now when you go to tie your hair up, you just hook one button around another to secure.