How To Tuesday – Cactus Recipe Card Holder
 Super easy little clay cactus friend that you can use to hold your recipe cards. You could also use him as a ring holder, or maybe just a little desk friend?
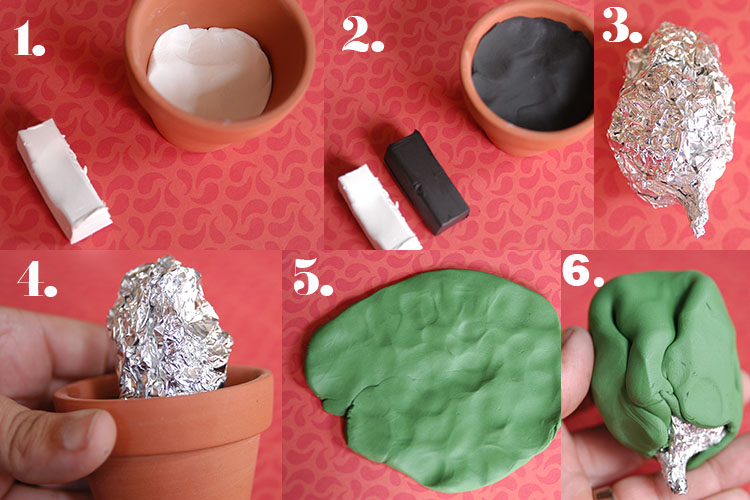
 1. Open the white clay and save a small amount for the eyes. Press the rest in the bottom of your pot to help weigh it down.
2. Repeat step one but with the black clay. I found the clays on sale for 88¢ and the pot for 25¢, the toothpicks and foil I had on hand so the whole project is under $3.
3. Form your tinfoil into a base for your cactus. Leave a tail area that can be pushed into the black clay.
4. Check your form to make sure it’s a good size for your pot. Add more tinfoil as needed.
5. Roll out your green clay (save a small sized piece aside for nose)
6. Wrap green clay around the tinfoil form making sure all the foil is covered.
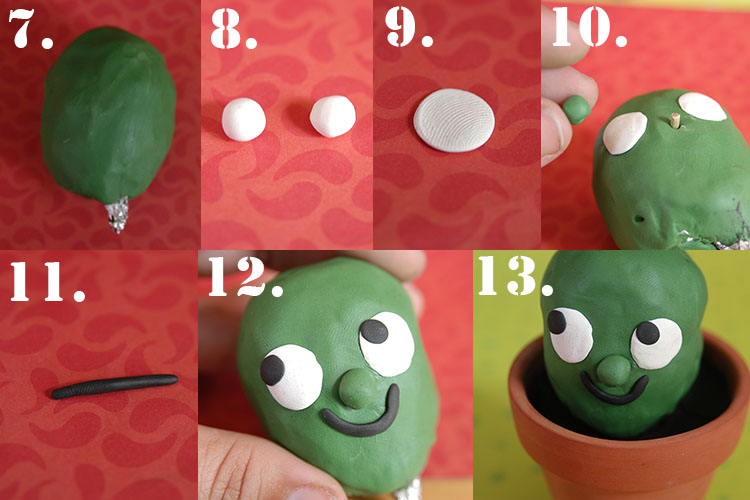
 7. Use your hands to smooth the green clay
8. Make two small balls of white clay for eyes and two smaller balls of the black clay for the pupils.
9. Flatten eyes gently, peel up and use the side that was flattened against the table facing out because it will be smoother.
10. Gently press the eyes and pupil to face trying not to leave many fingerprints. You can also attach a green ball nose as this point. I pushed in a small piece of toothpick first to push the ball nose onto.
11. Roll out a small snake of the black clay for the mouth. You can flatten it slightly like the eyes before adding it to the face.
12. Push your cactus down into the black clay inside the pot.
13. Push in toothpicks all over his head. Make sure they are staggered slightly so when you push a recipe card in (after baking) you can weave it between the toothpicks. If any of your toothpicks feel loose after baking you can always glue them in, but because my toothpicks went down into the tinfoil center they seem very sturdy.
Now just bake the whole pot in the oven and bake according to the instructions on your package of clay.
***Oh and the adorable recipe cards can be purchased here they are by Miss Emily of course—her stuff seems to be all over my house this week :)
